
Cleaning your camera lens may seem simple, but doing it incorrectly can cause permanent damage. Improper cleaning can scratch the coating and degrade lens performance over time. This guide will detail what works, what doesn’t, and why lenses are so important to content creators.
Why Proper Lens Cleaning Matters
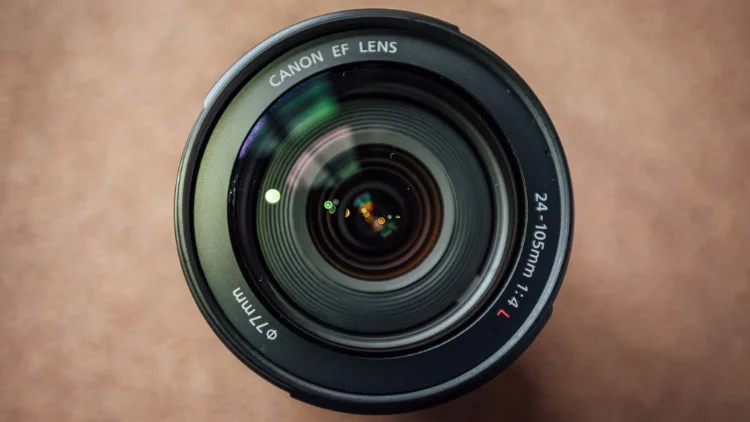
The lens is one of the most important parts of your camera setup, but it’s also one of the most fragile. Dust, smudges, and scratches not only affect image quality but can also lead to expensive repairs or replacements.
And producing high-quality visuals starts with a clean lens. Whether you’re shooting photos or videos, the clarity and sharpness of your work depend heavily on the condition of your lens. As YouTube photography expert Peter McKinnon often says, “The lens is your window to the world. If that window is dirty, your view and your audience’s view will be affected.” Similarly, creators like Matti Haapoja of Travel Feels emphasize that even a small stain can ruin an otherwise perfect photo.
Thankfully, lenses are very durable, but poor cleaning habits (like using paper towels or neglecting to sand) can quickly wear away their coating. Taking a few extra precautions can make a big difference.
Related read:
How to Get Comfortable Shooting Music Videos
The Best Tools for Cleaning Camera Lenses
1. Microfiber Cloths
- Silky Microfiber Cloths: These are durable and won’t fall apart even with frequent washing, but they don’t absorb liquids as well. They’re better for light cleaning.
- Cotton Microfiber Cloths: These have a finer texture and are great for removing heavy stains. They absorb lens cleaners more effectively, but they will shed lint over time as they wear out.
Avoid using anything wood pulp-based, like paper towels or facial tissues. These are too abrasive and may leave residue on your lenses.
2. Optical Lens Cleaners
Most lens cleaners are a mixture of water, isopropyl alcohol, and a mild detergent. They’re effective at removing grease and fingerprints. Always spray the cleaner onto the cloth, never directly onto the lens. Liquids can soak into and damage the body of the lens.
Pre-moistened lens wipes are a good option if you’re traveling. They’re small, easy to use, and gentle on the coating.
3. Residue Remover (RoR)
If standard cleaners aren’t enough, you can try a more specialized product like RoR. It’s designed to handle more stubborn grease and residue. Modern formulas are safe, but always test a small area first
What Not to Use
Breath and T-Shirts: It’s tempting to just breathe on your lens and wipe it with your shirt, but this combo lacks cleaning power.
- Your breath is mostly water, which won’t cut through fingerprint oils.
- While cotton shirts are unlikely to scratch glass, they can smear dirt, making things worse.
Household Cleaners: Avoid using products like vodka or DIY alcohol mixes. These may contain additives that can harm your lens coatings. Leave the vodka for personal consumption—it doesn’t belong near your gear.
How to Clean a Camera Lens?
Step 1: Turn off the camera and remove the lens
Before cleaning, always turn off the camera and carefully remove the lens. This step not only prevents the camera from being mishandled during cleaning but also prevents friction between the lens and the camera body. This protects the camera’s internal components from accidental damage.
Step 2: Use a lens blower
First, use a lens blower to remove loose dust or particles from the surface of the lens. Hold the blower a few inches from the lens and gently squeeze the ball to blow air, avoiding direct forceful sprays to prevent dust from being blown into the lens. Avoid using compressed air, as it may contain moisture or forcefully push dust into the lens, potentially causing damage.
Step 3: Use a soft-bristle brush to remove particles
If there are still stubborn dust particles on the lens, use a soft-bristle lens brush to gently brush them off. Choose a dedicated lens brush and avoid using an inappropriate brush with hard or dirty bristles. Be gentle when brushing, making sure not to scratch the surface of the lens.
Step 4: Apply lens cleaning fluid
Put a small drop of special lens cleaning fluid on the lens cleaning cloth. Avoid spraying the cleaning fluid directly onto the lens surface to prevent the liquid from seeping into the lens barrel and causing internal damage. The cleaning cloth should be slightly damp but not dripping. Use a mild, non-alcoholic cleaning fluid to avoid damaging the lens coating.
Step 5: Use the “chopstick method” to clean stubborn stains
If there are hard-to-remove stains or fingerprints on the lens surface, you can use the “chopstick method” for a deeper clean. Fold the lens cleaning cloth in half and then fold it again to form a rectangle, with the corners of the folded cloth forming a small tip. Then insert the chopstick into the fold of the cloth, rotate it, and use it carefully to avoid scratching the lens. Make sure the cleaning cloth is sufficiently cushioned to avoid direct contact with the lens.
Step 6: Clean the lens surface in a circular motion
Use the damp lens cloth in a circular motion, starting from the center of the lens and gradually expanding outward. Avoid using too much force, especially when encountering stubborn stains. Wipe gently, avoiding excessive friction to prevent damage to the lens coating.
Step 7: Use a lens cleaning pen
If there are still small particles or dust left on the lens, you can use the brush head of the lens cleaning pen to remove them. First, use the brush head to remove large particles, and then use the soft tip of the cleaning pen to clean the lens surface. Follow the instructions for the cleaning pen and avoid excessive force.
Step 8: Check the lens for streaks or water stains
After cleaning, carefully check the surface of the lens to make sure there are no streaks, stains, or residual cleaning fluid. If you find any problems, you can use a clean lens cloth to gently wipe, or clean certain areas of the lens again until the cleaning effect is satisfactory.
Quick Tips for Safe Lens Cleaning
To sum up, here’s how to keep your lens spotless without damaging it:
- Always remove dust and debris first using a blower bulb or soft brush.
- Use a proper lens cleaner—pre-moistened wipes or isopropyl alcohol-based solutions work best.
- Stick to microfiber cloths designed for optical use. Replace them when they start to wear out.
- Spray cleaner onto the cloth, not directly onto the lens.
- Consider using a UV filter to protect your lens from scratches and reduce cleaning needs.
Wrapping It Up
By breaking bad habits and using the right tools and techniques, your footage will stay looking new. And you’ll be able to shoot amazing work. Feeling inspired? If you’re going to start making your videos, don’t forget the importance of music, and more importantly, high-quality royalty-free music.
Our music is ARC certified, guaranteed to be safe, and once downloaded, it can be used for life without renewal. It’s better than royalty-free. It’s worry-free. Get started with TemPolor below.